


Hey folks, Ollie here and today we’re going to be doing a review of the mechanical number pad called the Montex by IDOBAO. So the reason I’m doing this review is I’ve been hooked on custom mechanical keyboards for a little over a year now. I’ve built a couple of dozen in that time span, starting with this bad boy the Tofu 60 You’ll notice this is a 60% keyboard and it doesn’t have a number pad.

So that’s what brought me on my journey to find a good custom mechanical number pad. I’ve tried the GK21 and I’ve tried the Launch Pad, and they were good, but they weren’t solid enough for me. That’s what brought me to the Montex mechanical number pad by IDOBAO.
We’re going to be building this bad boy today as well as doing a review on it. So let’s get right into the mechanical number pad called the Montex by IDOBAO build and review.

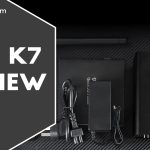
Here we have everything that comes in the box of the Montex mechanical number pad.
We’ve got the top case with integrated plate made of CNC’d aluminum.

and then we also have the CNC aluminum backplate

along with the hot swappable PCB, and those are the stock stabilizers on the PCB as well I’m not going to be swapping those out

platefoam is even included as well, but no bottom case foam

and here is everything else that’s included as well. You can see the coiled cable, the keycap puller, the screwdriver, the spare screws, the feet for the bottom of the case, and they even included some extra hotswap sockets and diodes just in case you break anything off the back. But before we put all of this together and to make sure we don’t pop off any of those hotswap sockets, we’re going to be testing the PCB first. I recommend doing this on any custom mechanical keyboard build, whether it’s a number pad all the way up to a full size.

So to the first thing that you always want to do when you get a new keyboard or a new mechanical number pad like we have here is test the PCB.
There’s going to be a couple of things you need to test the PCB:
After you’ve taken apart the case by removing the 4 screws at the back, lay your PCB upside down on your anti-static material and plugin in the USB-C cable as shown below.

After you’ve got your PCB plugged in and ready you’re going to want to open VIA. The version of VIA I have is the legacy version that is installed natively on my machine. VIA is now 100% online and you can access it at https://usevia.app/


Once you got the number pad selected, go to the key tester and enable the test matrix and you can enable key sounds(VIA legacy only)


Then you just take your tweezers and you touch them to the back of the hotswap sockets on the back of the PCB. By bridging this connection, you are actuating the socket as if a switch was inserted and being pressed.


Almost all vendors and manufacturers recommend you tweezer test your PCBs before inserting switches, especially on hotswap boards. The reasoning is that inserting a switch incorrectly is one of the most common ways to break a hotswap PCB. So they recommend you test first, since once the switches are inserted there is a high chance you broke the PCB yourself.
When the switch isn’t aligned correctly and/or inserted with too much force, you can pop off the hotswap socket. If you lift the pad from the PCB when that happens you can’t just solder the socket back on either. You’d have to trace the column and jump the socket to another switch. Most vendors aren’t going to replace a PCB that you broke by popping off a socket.
On the flipside, if you find an issue during tweezer testing, support is going to take your claim with more weight since you followed best practices by testing first. So take your time and be sure to test every socket.

All right now we’re gonna get to the actual build portion. So the switches we’re going to be using in this are some Boba U4Ts at 62 grams. These are from Kirball’s Keys and they they were purchased prelubed.
Here’s the main case with the integrated plate, that means it’s part of the case.

I’ve already lubed the stock stabilizers with Krytox XHT-BDZ on the wires and Krytox 205G0 on the housings.
You just take the PCB with the plate foam side facing the inside of the plate and line up the USB-C to the slot in the back of the top case.
Then you’ll have something like this.

Then just take the 4 PCB screws with their washers and secure the PCB to the top case.

With the PCB now attached to the top case, it’s time to install our switches.
Always make sure to support the hotswap socket from the back when inserting a switch.

Make sure you support the back of the hotswap socket for every single switch you insert.

Once you’ve got all the switches in place it’s time to put on the backplate. The Montex Mechanical Number Pad by IDOBAO comes with an aluminium backplate

I upgraded to the acrylic backplate instead since I don’t use RGB on most of my boards, I figured why not let a little shine through on this number pad.

To secure the backplate to the top case just use the included 4 screws. If you upgraded to the acrylic backplate, make sure to use the screws that came with the backplate and not the ones that came with the number pad. They are bigger.

Now that we’ve got the Montext Mechanical Number Pad assembled with the switches and backplate, it’s time to finish her up with some keycaps.
For this build I’m going with NovelKeys Cherry Charcoal.

For the top row I’m going with DCS relegendables from PimpMyKeyboard(Signature Plastics). I’ll be replacing these with some OG Cherry Relegendables I got from r/mechmarket soon.
Here is my completed Montex Mechanical Number Pad by IDOBAO. I’m really loving Cherry Charcoal on her and can’t wait to use the rest of the set on my Black on Black Frog TKL.
Here is the timestamp link for some b-roll I made to show her off: https://www.youtube.com/watch?v=Ww9Kh5K1OJo&t=470s


The Montex mechanical number pad by IDOBAO is a great, relatively budget option coming in around 70 to 80 bucks depending on if you get it on sale.
It has full aluminum body and you can upgrade to the acrylic backplate on the bottom if you want some of that RGB to bleed through, which is what I’ve done.
It has the extra column on the left, which really opens up some more buttons besides just the number pad which I love. I love using macros and navigational keys, especially on smaller keyboards.
It sounds great. I didn’t have to spend money on extra stabilizes the stock stabs on here sounds great with a little bit of BDZ on the wires and 205G0 on the housings.
I can definitely recommend picking on up if your in the market for a good custom mechanical number pad.


